MID Patrol Walkthrough
- Glaciermage VS Nacho
Prototype Game Walkthrough With Diagrams!
The game is like Battleship, with a MineSweeper twist. You each have a game board where you place your "battleships" before the game starts. There are 2 steps to placing your Mages.Step (and Diagram) 1:
Place your Fire Mages
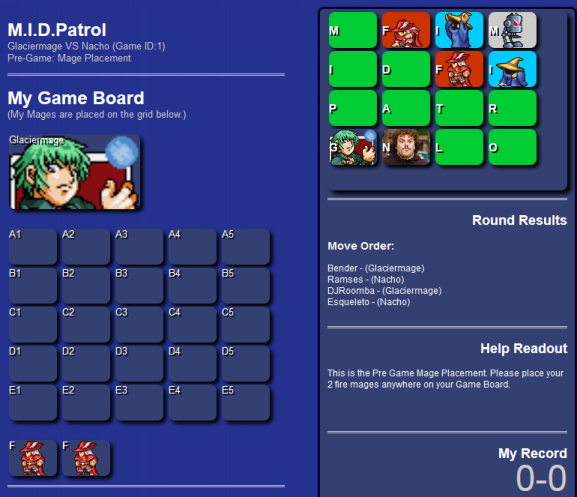
This is your 5x5 grid.
(Note: You can also play the game in a 6x6 grid. There are a few more pieces, but the same rules apply.)
Remember, your fire mages act as your "mines" that your opponent doesn't want to hit. Step 1 is easy. Eventually you will see strategy is involved here, but for now just place your fire mages anywhere on the grid. I decided to place mine on C5 and D3. (Shown in Diagram 2)
Step (and Diagram) 2:
Place Your Ice Mages
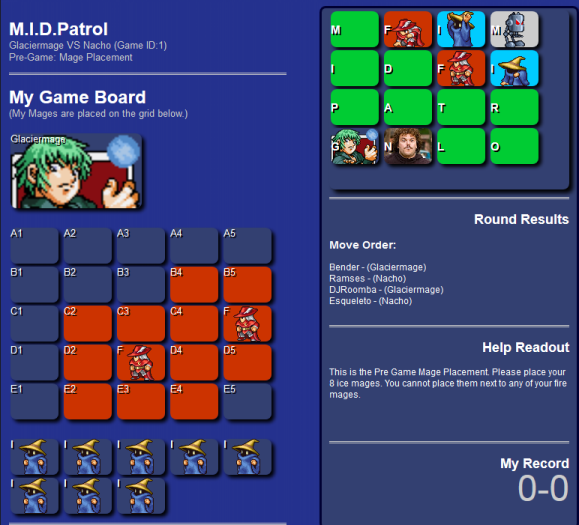
If you will look at the "Help Readout" in the Sidebar of Diagram 2, you will notice a rule regarding Step 2. You cannot place Ice mages next to any Fire Mages. (Because Ice beats Fire and the Fire mages would be neutralized.) I have highlighted the spaces you cannot place Ice Mages in Red. This simple rule will help you out later in the game, and is where the strategy comes in. I'll explain later. For now, I place my Ice Mages on the Grid. Round 1 Begins! Time to use your 2 MID units.
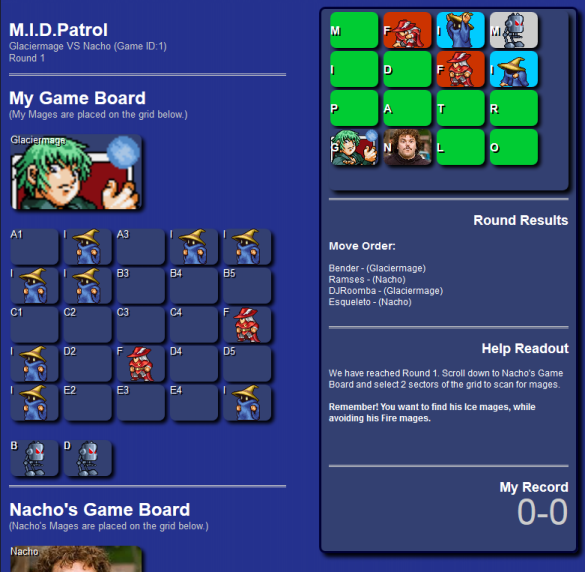
As you can see I've placed my Ice mages, and it is the start of Round 1. It's time for me to start finding Nacho's Ice mages, while avoiding his Fire Mages. I have 2 MID Units to search his grid with. I named them Bender and DJRoomba. (You can name your MID units whatever you would like.) Also notice that there is a Move Order listed in the "Round Results". To help speed things up, you are allowed to move both of your Units at one time, regardless of what your opponent has done. But in reality, even if I've moved DJRoomba before Nacho has moved Ramses, Ramses move will count before DJRoomba. Make Sense? It's only important if you both win (or lose) in the same Round. Move Order is chosen randomly at the start of a game, and remains the same for every round.
Step...4?
Scrolling Down to Nacho's Board
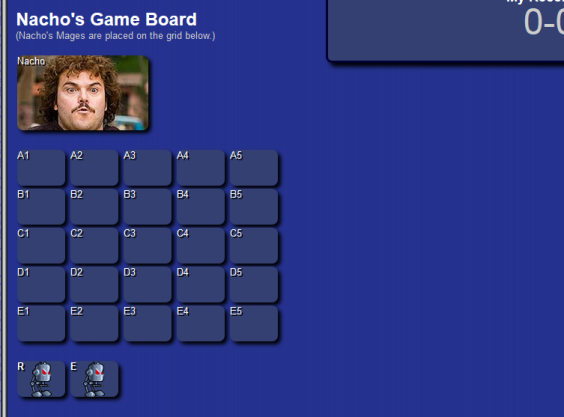
Once I have chosen my mages, my gameplay will all be on Nacho's board. If I scroll down to it, it looks like this. I am free now to make my first moves. I am going to choose 2 spots at random, and hope I don't hit a Fire Mage.
My First Round Moves:
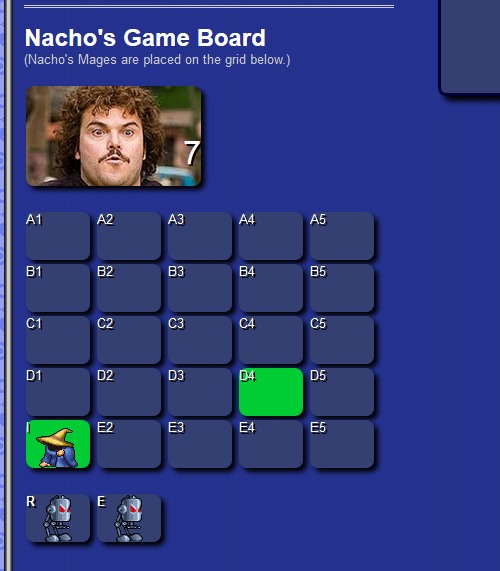
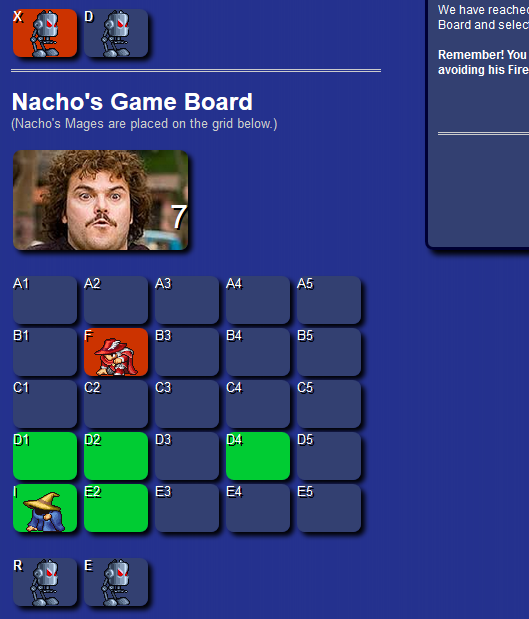
My first move was D4. All of my moves on Nacho's board are marked in Green. (Unless I hit a Fire Mage. Those are Red.) As you can see, I hit nothing in D4. This also tells me nothing. The adjacent squares could still contain nothing, an ice mage, or a fire mage. My next move is more successful. I select E1, and hit an Ice mage! This is where the rule about placing mages comes in handy. Remember, Ice mages cannot be touching Fire Mages. So I know I can safely clear D1, D2, and E2, and have 0 risk of hitting a fire mage. If any of those squares contains an Ice mage, the squares around it are safe. If you chain all of your ice mages together, and your opponent hits one, he can safely find them all eventually. Notice too in Nacho's picture, there is a 7. When Round 1 begins, this displays the remaining Ice mages Nacho has. My avatar will contain the same information. I've made my moves, let's go see what Nacho did.
End of Round 1:
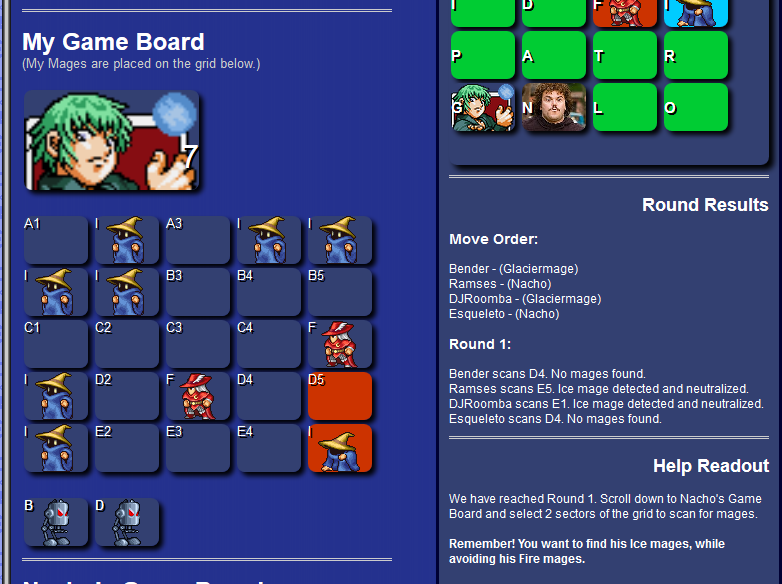
All of Nacho's moves on my Board are in Red. By looking at the Round Activity, you can see that he hit on his first move, E5. So now he is going to clear D5, D4, and E4 (if he's smart) and hope he finds another Ice mage. I think you get the basic understanding of the game. I'll fast forward a bit to one more event:
Boom goes the Dynamite:
As you can see, after hitting on E1, I spent the next few rounds clearing around it. I tried D1, D2, and E2 to no avail. So I decided to randomly try another sector, B2. DISASTER! Bender has hit a Fire Mage. Bender has a big X on his avatar, is taken out of commission, and I can only move once per round from this point forward. Although this sucks, and Nacho has twice the moves as me unless he hits a Fire mage, it does still give me some much needed information. Remember that Fire Mages and Ice Mages can't touch each other. So I know that A1, A2, A3, B1, B3, C1, C2, and C3 all are empty of Ice Mages. All those sectors can only contain nothing, or another Fire Mage. That leaves me with 11 available squares to find 7 ice mages. He has obviously grouped his mages together and gotten lucky that I didn't land on them right away.
That is the extent of the game. The best way to learn how to play is to just play it. The Help Readout will show you exactly what moves to make. Have fun!
Game Comments
- Game Comments Displayed Below